
Custom Silicone Ice Mold Design Guide
Size the cube, the lid or split, and how the full tray leaves the freezer. A logo on a stock tray is a different job.
 Kyler Yang · Founder8 min read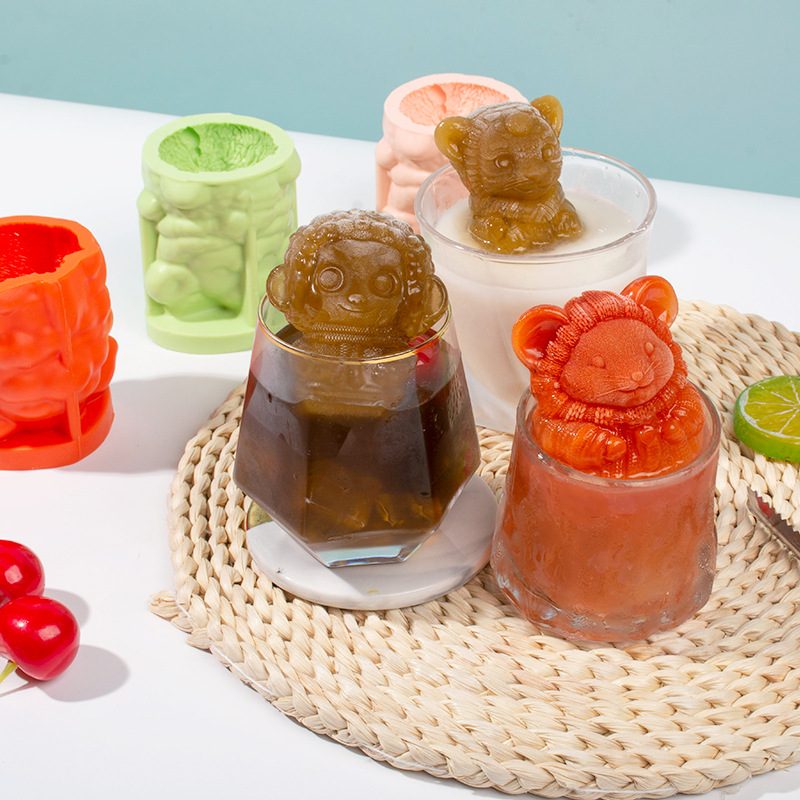
A good custom ice mold starts with the finished ice and the service workflow.
The design should answer:
- What shape and size must freeze?
- Where is the logo visible?
- How will water enter and trapped air leave?
- How is the mold carried when full?
- How is the frozen ice released?
- Is the mold used by a bar team or a consumer?
- What food-contact documentation is required?
There is no one Shore A, logo depth or wall thickness that answers all of those questions.
1. Cube, Sphere, Spear or Custom Shape?
Cube
Usually the simplest geometry, but large branded cubes still need:
- logo placement;
- adequate support;
- manageable release.
Sphere
Often needs a two-part/lid structure and controlled fill/air path.
Spear
Long aspect ratio affects:
- filling;
- handling;
- release;
- mold support.
Custom Shape
Bottle silhouettes, icons and novelty shapes can introduce:
- thin projections;
- undercuts;
- trapped air;
- weak ice sections.
Select the structure from the geometry.
2. Design the Release Path
Ice is rigid and brittle compared with the silicone mold.
Ask:
- which way the ice leaves;
- how far the silicone must stretch;
- whether the logo creates a lock;
- whether a sphere must be opened in halves;
- whether thin ice features will break first.
A softer mold is not automatically safer if the filled tray becomes too unstable.
3. Logo Detail
For a branded cube or sphere, review:
- real ice size;
- visible face;
- raised/recessed logo result;
- stroke width;
- spacing;
- depth;
- corner geometry;
- ice thickness behind the feature.
Prototype the actual frozen result when branding matters.
A logo that looks sharp in CAD can trap air or weaken the ice after freezing.
4. Fill and Air Path
Water has to fill the cavity while displaced air escapes.
This matters especially for:
- spheres;
- closed/lidded designs;
- narrow top openings;
- complex brand shapes.
Possible design features can include:
- fill opening;
- vent/air path;
- overflow/reservoir;
- controlled seam.
Do not use one standard vent size for all ice molds.
5. Sphere Alignment and Seam
For a two-part sphere mold, review:
- alignment features;
- joint/seam position;
- clamping or closure;
- fill point;
- air escape;
- opening sequence.
The seam should be controlled rather than treated as an accidental result of two loose halves.
6. Filled Handling and Support
Before finalizing cavity count, calculate the workflow:
- how much water one tray carries;
- who moves it;
- how far;
- whether it uses a carrier/pan;
- freezer shelf size;
- stacking;
- spill control.
Large ice molds are often a handling problem before they are a demolding problem.
7. Hospitality vs Retail
Hospitality
Focus on:
- station footprint;
- repeated fills;
- staff handling;
- washing;
- orientation;
- fast removal.
Retail
Focus on:
- lid;
- user instructions;
- packaging;
- shelf/box dimensions;
- consumer ease of fill and release.
One design can serve both in some cases, but do not assume the priorities are identical.
8. Clear Ice: What the Mold Can and Cannot Do
The mold can control:
- shape;
- logo;
- cavity surface;
- release;
- fill geometry.
It cannot guarantee clarity by itself.
Clear ice production commonly depends on water quality, dissolved gases/impurities and freezing method.
If the buyer has a directional-freezing or other clear-ice process, design the mold so it works with that system.
9. Food-Contact Specification
Send:
- selected market;
- use condition;
- cleaning;
- color;
- required report/declaration.
A generic “food-grade” or FDA/LFGB line is not enough to identify the evidence required.
10. Prototype the Complete Workflow
A useful ice-mold prototype should test:
- fill;
- air escape;
- leak/seam if split;
- freezer handling;
- full freeze;
- opening/release;
- logo/detail;
- tray support;
- cleaning.
For a hospitality buyer, involve the actual service team if possible—the operator may identify handling problems that are invisible in CAD.
11. Record the Approved SKU
Keep:
- CAD revision;
- ice dimensions;
- logo artwork/version;
- cavity count;
- tray outside dimensions;
- lid/split design;
- support method;
- selected material;
- approved sample.
This reduces ambiguity on reorder.
Common Problems
Logo Cracks or Chips
Investigate:
- logo depth/geometry;
- ice thickness;
- release direction;
- incomplete freeze;
- operator twisting.
Sphere Has a Large Air Pocket
Investigate:
- fill opening;
- air path;
- filling orientation;
- water/freezing process.
Tray Is Hard to Carry
Investigate:
- filled mass;
- support;
- tray span;
- grip/edge geometry;
- cavity count.
Ice Is Cloudy
Investigate the water/freezing process before redesigning the logo or silicone hardness.
Frequently Asked Questions
What Shore A is best for branded ice cubes?
There is no single answer. Ice geometry, tray span, support, material properties and release method should be reviewed together.
How deep should an ice logo be?
There is no universal depth. The logo must remain readable without trapping air, weakening the ice or making release impractical.
Do large spheres need a two-part mold?
Often, but the correct structure depends on the sphere and fill/release method.
Can the same tray produce clear ice?
The tray can be part of a clear-ice process, but the mold alone does not guarantee clarity.
Commercial Next Step
For product development and quotation, see custom silicone ice molds. Tray stiffness under a palm press is a separate note: ice tray hand-press.
Custom silicone development · DFM & prototype support
CAD, drawing, photos or sample details